Building the Eun Mara "Skerry"
Rudder and tiller
I decided early on to go with the external rudder for Skerry. The decision was completely aesthetic - I think it complements the overall style of the boat and just looks great.
I didn't take any progress shots of the rudder construction. It's made from five sheets of 12mm ply (not counting the cheeks at the top), with the central sheet cut out to contain the pivoting drop-down blade. (The total thickness is slightly more than the design, and ended up too thick for the pintle straps. I used a freehand router to cut out a 1.5mm rebate, which you can just see in the following two images.)
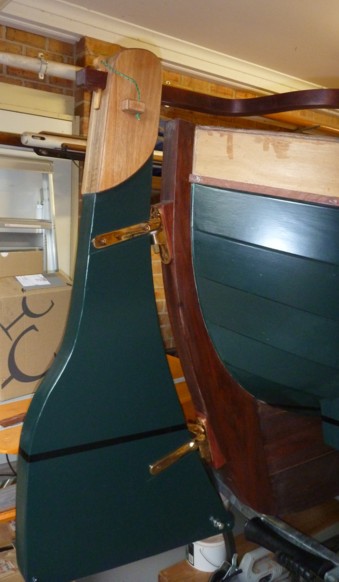
Here is the completed rudder in place (without the drop-down blade and its associated up-haul line). The bronze fittings are from Briggs Marine in Melbourne. Note the wedge-shaped pieces on the stern post that allow the pintles to be aligned. The gudgeons are epoxied in place, and further secured by 3 1/2" #14 silicon bronze screws.
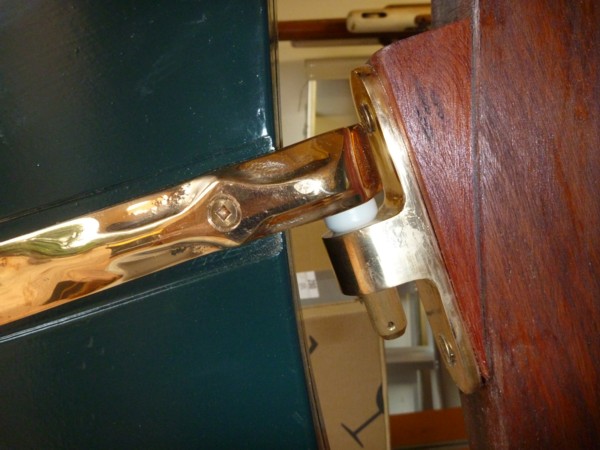
This close-up of the top fitting shows one of the nylon olives that I used to space each pintle and gudgeon. With the olives in place the rudder turns more smoothly and quietly, and also has a slightly greater range of rotation. As the olives are compressible they also help to distribute the weight of the rudder between the two gudgeons. (The olives I used come from the inside of brass compression joints used in plumbing.)
(Dale, yes, they are some of the square keyed bronze screws you gave me when I visited. Thank you again!)

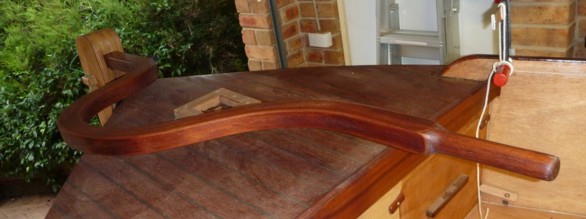
These two shots show the laminated tiller in place. (See below for construction details.) I went with a single sided tiller so that it can be removed while the mizzen mast is in place. (I'm not sure that I'll want to do this, but thought it might be convenient when moored.)
(Note: The plans indicate that two tight bends are required in the tiller between the rudder insertion point and the position of the mizzen mast. I unthinkingly followed this without checking on the boat, or reading IanM's comments regarding these curves. In fact tight bends are not required, and the steaming I describe below was unnecessary. However, it was good experience as I had never tried steaming before.)
To laminate the tiller I used the same 2.5mm cedar stock that I used for the laid decks. This stock splintered easily when bent, so I had to resort to steaming the two tight curves at the rudder end of the tiller.
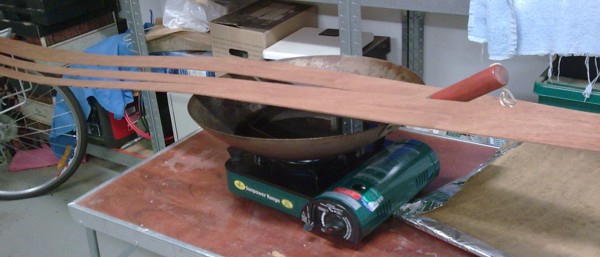
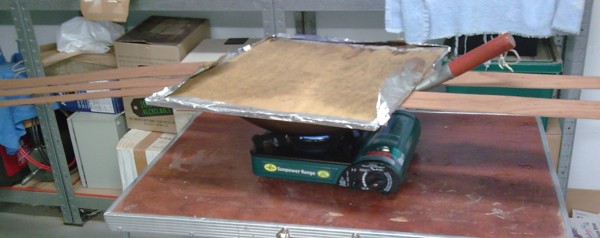
Here is the simple steaming arrangement. The length of a strip that needed steaming was around the diameter of an old steel wok that I had to hand. I part filled the wok with water, brought it to the boil on a butane camp stove, laid four strips at a time across it, covered it with a sheet of scrap ply (wrapped in foil to stop it from steaming), and cooked for 20 minutes (turning once).
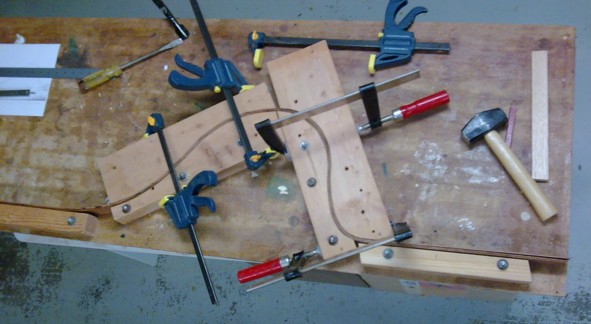
Then I clamped them in a sawn template (the bottom sections of which are bolted to the bench) with the steamed section positioned in the tight bends on the right.
When they had cooled down for around 30 minutes the strips were unclamped and left to dry out. They retained enough of the curve not to crack when they were subsequently re-inserted into the template for gluing.
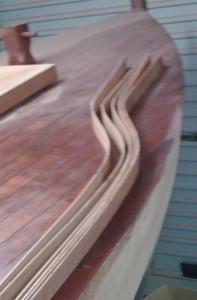
Here are the first four strips glued (with epoxy) and allowed to cure.
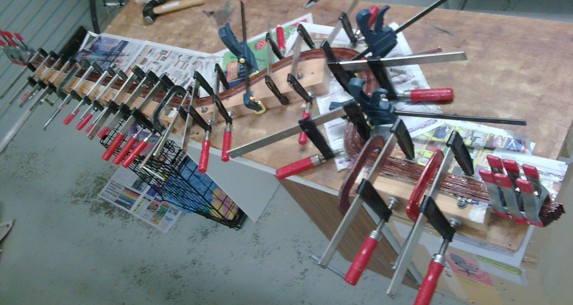
I then discarded the top blocks of the template and simply clamped the remaining strips to the first four, keeping the whole mess pressed against the blocks that are bolted to the bench.
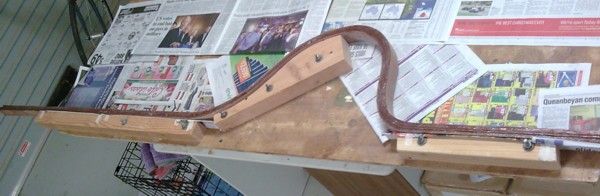
When fully cured it was just a question of sanding/planing to shape, and dribbling epoxy into a few gaps where laminations had not closed up properly. I then inserted the tiller into the rudder head (while actually mounted on the boat) and did some test handling in the cockpit to decide where to trim the forward end. The final result is in shown the Rudder section near the top of this page.